
Essential Antarctica Photography Tips: Practical & Creative
Creative and practical advice to make the most of your photos
Photographing in Antarctica can throw you for a loop if it’s your first time. Inclement weather, shooting from boats, high-contrast conditions, and wildlife flying, swimming, and waddling is not your usual mixed bag.
On my expedition cruise to Antarctica with Aurora Expeditions, which included the Shetland, South Georgia, and the Falkland Islands, I learned a lot on the fly. But my hard-earned lessons are to your benefit. Here are some suggestions from my experience that helped me navigate obstacles in the field and make the most of my images behind the lens.

Creative Tips
Consider Photographing From Eye-level or Below
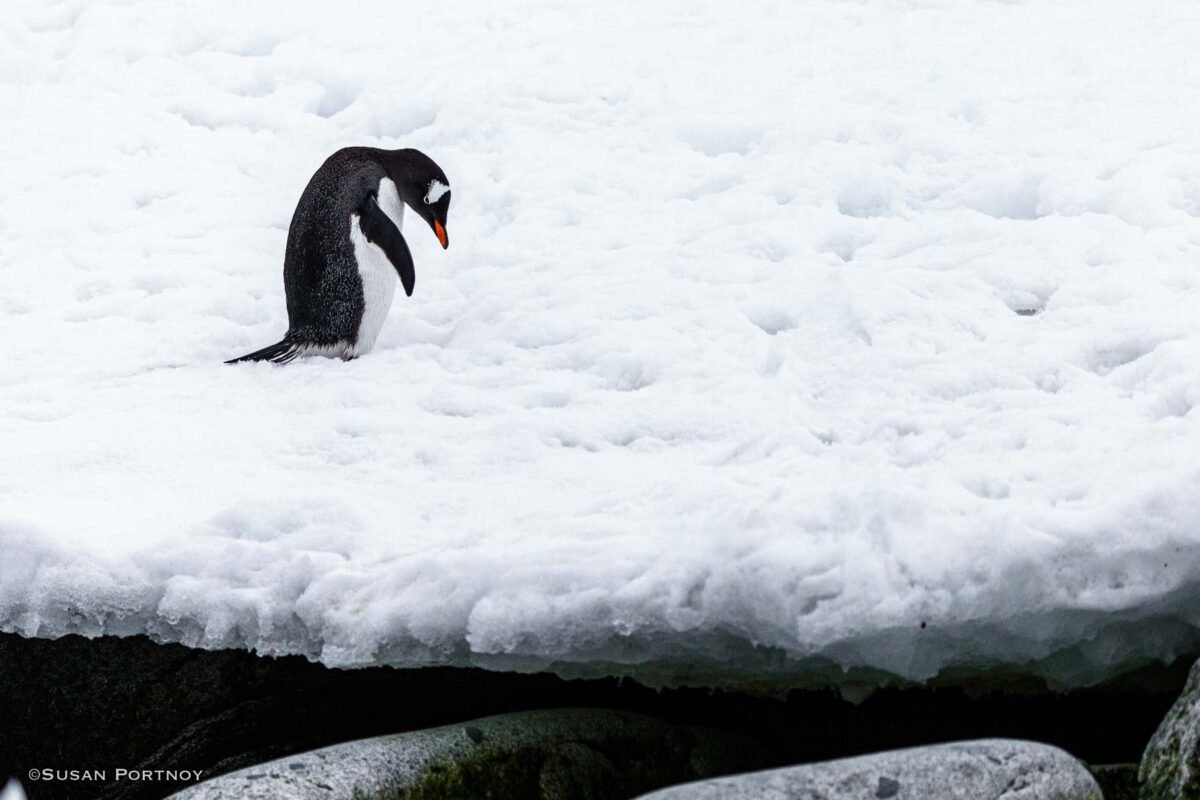
Wildlife in Antarctica at its tallest is hip high or shorter, which means if you frame your image from your height, you are shooting at a downward angle. This works fine in some instances, but you’ll create more powerful images by positioning your camera at the subject’s eye level.

Shooting from below imbues a subject with a sense of majesty. It’s always worthwhile to experiment with different heights and angles. That means sometimes crouching, kneeling, or, depending on the animal’s position, laying on your stomach.

Pay Attention to Your Exposure
In snowy conditions, the right exposure is a balancing act. Your camera’s meter will respond to the brightness of a snow-filled environment by rendering the scene grey. The usual fix is to add exposure compensation.
However, increasing the exposure compensation in highly reflective conditions such as snow and ice can also lead to aspects of your image blowing out if you’re not careful, losing precious detail in the process.

I found that a slightly underexposed image, corrected in post-processing, results in more successful photos.
(Pro-tip, you might see a tint of blue in your images. By decreasing the blue saturation, the snow will become whiter and brighter.)
Mind Your Shutter Speed
Exploring icebergs and shorelines by zodiac is common on an expedition cruise, giving passengers an opportunity to observe the scenery and wildlife from a different perspective.
Even if you are traveling at a leisurely pace, or the engine is off, but there are waves, remember to offset the boat’s motion when taking photos with a faster shutter speed. Otherwise, your images will blur.
(Pro tip: Use the zoom on your LCD to check if your shutter speed is accurate for the conditions. A closeup of the image will reveal a softness or blur that may look sharp when viewing in standard mode.)

Frame Your Subjects Wider Than Usual
Composing a photo in-camera is always my goal, but when the environment is unpredictable, it’s better to frame your scene a little wider to compensate for the unexpected, such as wildlife moving unpredictably. The added space gives you the wiggle room to crop without accidentally cutting off something important, like a body part.


Study Behaviors
Penguins and seals engage in repetitive behaviors giving you the advantage of anticipating their next move. Watch closely. Look for patterns in actions and responses.
A few examples:
1: If you spot a penguin on an iceberg heading toward an edge, it’s bound to jump. Knowing that gives you the time to compose your shot and increase your shutter speed to capture its descent in focus.

2: A fur seal moving towards the water will hobble toward the waterline, then stop for a few seconds. (I’m assuming to make sure there are no predators.) Those seconds allow you to get into a better position and compose your frame.

3: Rockhopper penguins love to stretch toward the sky, squawk, and dramatically flap their feathers. You may not know which rockhopper might shine when, but when you hear the inevitable rapid-fire vocalizations, it’s a heads-up to locate the culprit and snap away.

Take Advantage of the Beautiful Shapes and Textures
An entire iceberg under stormy skies makes a wonderful subject, but also look for full-frame opportunities showcasing wonderful abstracts of the bigger picture. The scenery and wildlife in Antarctica are rich with wonderful textures, colors, graphics, and shapes worth noting.


Look for Opposites
In a crowded rookery where an image can end up looking like a jumble of bodies without a clear story, look for opposites. The juxtaposition will signal the viewer where to look first. Maybe it’s an adult penguin amid many brown-feathered yearlings; one penguin waddling while others are stationary, or as in the first photo below, one King penguin facing front while the others look the other way.


Embrace Environmental Portraits
It’s hard to resist the urge to snap a zillion closeups of the wildlife in Antarctica, but you’re missing wonderful photographic opportunities if you don’t capture that seal, penguin, or seabird in its environment. Besides adding a sense of scale to the towering cliffs and chiseled icebergs, a wider-angle image gives the viewer essential context and understanding of the bigger picture.


The Candid Human Experience
Candid moments of other people to illustrate the human experience on the trip are more interesting (in my opinion) than posed images. Look for moments that give the viewer a realistic representation of your grand adventure from the perspective of those with whom you shared it. You’ll create more energetic photos that way than with something staged.


Practical Tips: What Gear I Used and Why Plus Some Suggestions
My Camera Kit
I took two bodies and three lenses: Canon 5D Mark III and Mark IV. My Canon 24-70mm f/2.8; 70-200mm f/2.8; and 200-400mm f/4 with 1.4 converter.

This kit gave me a lot of flexibility for wide shots and varying distances of Antarctic wildlife and landscape elements such as icebergs.
Antarctica (I’m including South Georgia/Falkland Islands) throws wonderful photographic opportunities at you constantly. But rarely at consistent focal lengths.

I carried two bodies for this reason. One fitted with a long lens for distance and the other for wide angles. You don’t want to risk changing lenses in the field with the wind, sand, snow, or saltwater. At best, you’ll nick your sensor. At worst, something gets into your camera that permanently damages it––no Bueno.

If you don’t own a second camera, I highly recommend renting. It is a smart and affordable solution if you don’t own two bodies. I’ve used Borrowlenses on and off for years. You can order online, and they ship it to you. It’s simple and a fraction of the cost of a new camera. Renting is also a smart way to test out new gear without committing.

Bags
What kind of bag and how a photographer accesses her gear in the field are preferences developed over time. You learn what works best for you in the doing. I always use my Gura Gear Kiboko 22L as the main transit bag. I also brought a large waterproof duffle in Antarctica to protect my Kiboko during all the landings. (For more info: Why I feel Gura Gear’s Kiboko Backpack is the Best DSLR Camera Bag)

Zodiacs travel at a decent clip unless you’re taking a leisurely tour, zodiacs travel at a decent clip. Random splashes or fine saltwater spray inevitably pools on the boat floor with your bag.
Unless your camera bag is 100% waterproof (water resistant isn’t sufficient), I recommend a waterproof duffle to shield your bag from water, sand, bad weather, and nosy wildlife.

Most of the time, I left my Kiboko in the duffle at the landing site, where staff members stood guard, and I returned to it as needed. I always prefer to walk around as light as possible.
On South Georgia Island, however, there were times I’d explore far from the landing site, and then I wore my Kiboko.
Camera Strap
I used my Black Rapid dual camera strap (FYI- it works with one camera as well), which I love for traditional travel and wildlife photography. Why? I like to be able to drop one camera by my side as I lift the other, and this camera strap makes that easy.
You can’t wear two camera straps crossbody without inhibiting movement. That leaves on camera hanging off a shoulder which I find irritating because it’s always sliding off. I also prefer not to pull a second camera from a backpack or other holders if I can avoid it.

Depending on how close I expected to be to subjects, I mounted either my 200-400 mm or 70-200 mm on one body. The 24-70 mm for environmental and landscape shots on the second.
On landings with this setup, however, I had to be mindful that the camera hanging by my side that I wasn’t using could hit the rocks, water, or snow when I knelt, which was often. I became proficient at balancing the unused camera on my lap while shooting with the other.
Cotton Carrier
Cotton Carrier’s camera harness is another option. It’s especially helpful when you need both hands for something else. I wore mine during a trek when I knew I’d need both hands to use my walking poles for uphill climbs. You access the camera by sliding it up and out of a locking mechanism on the harness and using a hand strap to hold it.

A harness is a great option if your camera is a relatively short wide-angle lens. I found attaching my longer 70-200 mm lens uncomfortable. I think owners with mirrorless kits probably find it a better option. My DSLR is significantly heavier.
I didn’t bring my Cotton Carrier Antarctica because, knowing I would wear multiple layers under a parka, I felt the harness would feel constricting. But I did see other guests using theirs.
Kneepads
I highly recommend investing in kneepads for this trip. In Antarctica, there are rocks, ice, jagged sand, or all three on land. Richard I’Anson, an excellent Australian photographer, suggested I bring a pair, and I am so grateful he did. Donning my kneepads, I could comfortably shoot from low angles as long as needed. Since the trip, I’ve continued to use them on questionable terrain, including city streets.

Rain Sleeves
The weather in Antarctica is volatile. A cloudless blue sky can turn to rain or snow, seemingly without warning. Rain sleeves will protect your gear when the conditions become rough.

Lens Cleaner
A good microfiber cloth and cleaning solution should always be part of your basic camera kit. For Antarctica, bring multiple cloths with you on landings in case one gets wet. In addition, bring a kleenex or other absorbent material to soak up water on your lenses, then follow up with the microfiber.

Tripod or No Tripod?
I rarely use a tripod unless I’m indoors or for night photography. I feel I lose my spontaneity. I can’t change position easily, and it’s cumbersome. But for those who prefer support for a long (heavier) lens, a tripod is a solution.
Ken Shew, a guest on the cruise, explains why he used a tripod. “By having [my camera] on the tripod and remote switch, I don’t have to be steadfast in looking thru my viewfinder and holding steady the lens,… and I can take the shot [without] looking thru the viewfinder. I can pre-focus … and just watch what may happen.”
In the end, it’s whatever you feel will better suit your style of photography.
If you found this post valuable, you may also like…
7 Tips for Photographing Amazon Rainforest Animals
All You Need to Know Safari Photography Tips
Where to Photograph Stunning Views of the New York City Skyline at Night
Explore the Great Bear Rainforest, Home of the “Spirit†Bear, on a Small Ship Cruise
The Ultimate Guide to Polar Bear Tours in Churchill Manitoba
nice airtcle
Thank you!
Lots of wonderful photos and great tips here, Susan! I will be implementing some on our next trip to Canyonlands, although an entirely different experience.
I’m so happy you find the article useful. Thank you for letting me know.